Introduction
Rust can be a major problem for classic car owners. It not only ruins the appearance of your cherished vehicle but also weakens its structure. In this article, we will guide you through essential tips for rust removal and prevention to keep your classic car in pristine condition. We’ll cover everything from understanding how rust forms to the best techniques and products for rust removal. By the end, you’ll have a comprehensive understanding of how to tackle rust issues effectively and maintain your classic car’s beauty and integrity.
Importance of Rust Prevention and Removal
Preventing and removing rust is essential for several reasons:
- Maintains Appearance: Rust spots can ruin the look of your classic car, decreasing its aesthetic value.
- Preserves Structural Integrity: Rust can weaken the metal, compromising the safety and durability of the vehicle.
- Increases Resale Value: A well-maintained, rust-free car will fetch a higher price if you ever decide to sell it.
Overview of Common Rust Issues
Classic cars face several rust-related problems:
- Surface Rust: This is the most common type and usually affects the top layer of the metal. It’s often found on body panels and is relatively easy to remove.
- Scale Rust: This occurs when surface rust is not treated in time. It goes deeper into the metal and requires more effort to remove.
- Penetrating Rust: This is the most severe type, where rust has eaten through the metal, causing holes and significant damage.
Understanding Rust
How Rust Forms on Classic Cars?
Rust forms when iron or steel reacts with oxygen and moisture. This chemical reaction, known as oxidation, leads to the formation of iron oxide, commonly known as rust. Classic cars are particularly susceptible to rust due to their age and the materials used in their construction. When these vehicles are exposed to humid or wet conditions, the risk of rust increases significantly. Rust can begin to form within a few days if the metal is not properly protected.

Types of Rust
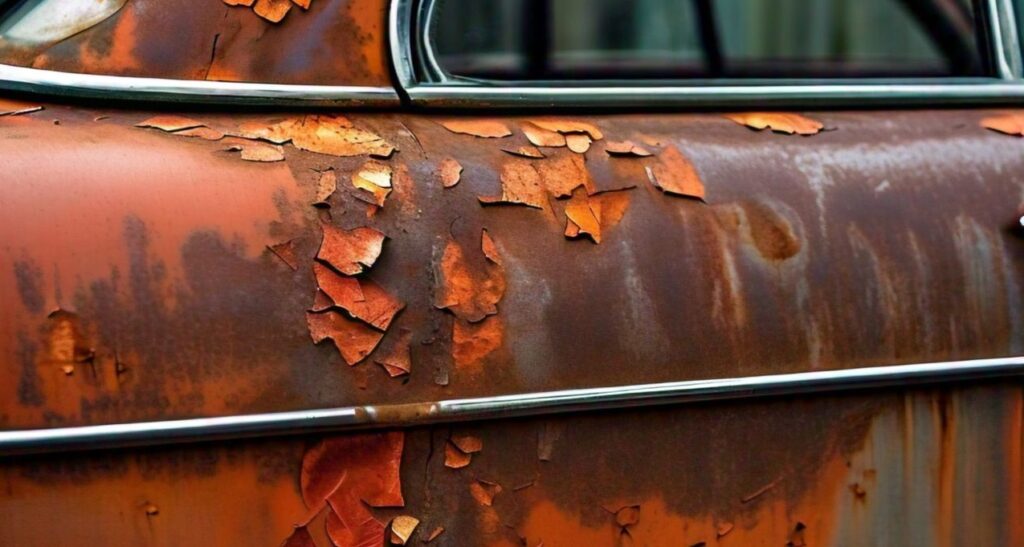
Surface Rust
Surface rust is the initial stage of rusting. It appears as a thin layer of rust on the surface of the metal. This type of rust is often seen as small, reddish-brown spots or patches. Surface rust is usually cosmetic and can be easily removed if addressed promptly.

Scale Rust
Scale rust occurs when surface rust is not treated. The rust begins to flake and scale off the metal surface. This type of rust can weaken the metal and cause more significant damage if left untreated. The affected area will appear rough and pitted.
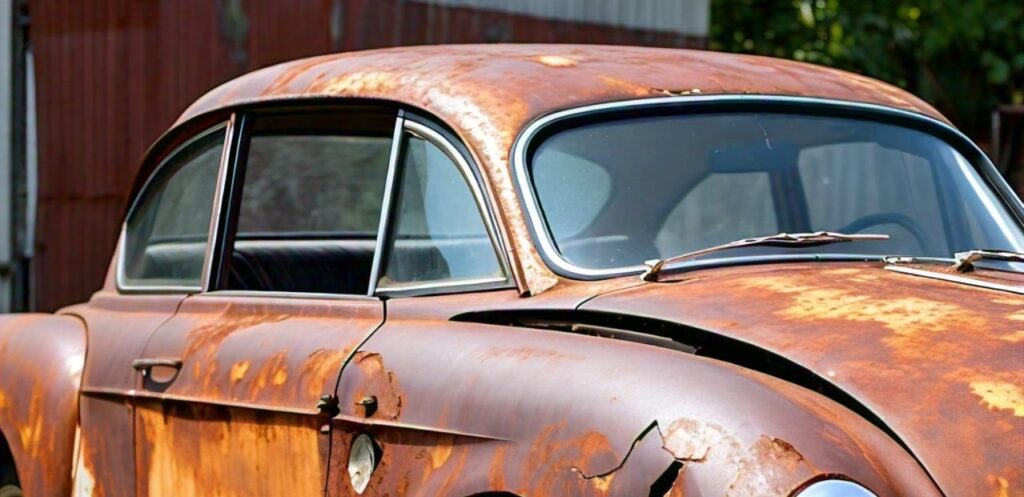
Penetrating Rust
Penetrating rust is the most severe form of rust. It occurs when rust penetrates deeply into the metal, creating holes and compromising the structural integrity of the car. This type of rust can cause extensive damage and often requires professional repair to restore the vehicle.
Rust Prevention
Preventing rust is crucial for maintaining the beauty and longevity of your classic car. By following these simple steps, you can keep your vehicle in excellent condition.
Regular Cleaning and Waxing
Regular cleaning and waxing are essential for rust prevention. Dirt, grime, and moisture can cause rust to form on your car’s surface. Here’s how to do it:
- Washing Your Car: Wash your car regularly with a gentle car wash soap and a soft sponge. Pay extra attention to the undercarriage and wheel wells, as these areas are prone to collecting dirt and moisture. Rinse thoroughly to remove all soap residues.
- Drying Your Car: After washing, dry your car completely with a microfiber cloth to prevent water spots and moisture buildup. Make sure to dry the hidden areas like door jambs and under the hood.
- Waxing Your Car: Apply a good quality car wax at least twice a year. Wax creates a protective barrier that repels water and contaminants. Use a soft cloth to apply the wax in a circular motion and buff it to a shine once it has dried.
Proper Storage and Covering
Storing your classic car correctly can significantly reduce the risk of rust. Here’s what you should do:
- Indoor Storage: Whenever possible, store your car in a dry, well-ventilated garage. Avoid parking on grass or dirt, as these surfaces retain moisture.
- Car Cover: Use a breathable car cover specifically designed for classic cars. A good cover will protect your car from dust, moisture, and UV rays while allowing air to circulate.
- Humidity Control: If you live in a humid area, consider using a dehumidifier in your garage to reduce moisture levels. This helps prevent rust and mold growth.
Use of Rust Inhibitors and Protective Coatings
Applying rust inhibitors and protective coatings can provide an extra layer of defense against rust. Here’s how to use them effectively:
- Rust Inhibitors: Spray rust inhibitors on vulnerable areas like the undercarriage, wheel wells, and engine bay. Follow the manufacturer’s instructions for the best results.
- Protective Coatings: Apply a clear protective coating to your car’s paint. These coatings bond with the paint to create a hard, durable layer that resists scratches and corrosion.
- Undercoating: For additional protection, consider undercoating your car. This involves applying a thick, protective layer to the underside of your vehicle to prevent rust and damage from road debris.
Inspection and Early Detection
Routine Inspection Tips
Regular inspections are crucial for keeping your classic car in top shape and preventing rust. Follow these simple tips to ensure you catch any issues early:
- Inspect Monthly: Make it a habit to check your car once a month. Regular checks help you spot any new rust spots or damage before they worsen.
- Use Good Lighting: Ensure you have bright lighting in your garage or inspection area. Proper lighting helps you see small rust spots and imperfections.
- Clean Before Inspecting: Always wash and dry your car before inspection. Dirt and grime can hide rust, making it harder to spot.
- Feel for Rough Spots: Run your hands over the car’s surface. Rust often feels rough or gritty compared to the smooth metal.
- Look Under the Car: Don’t forget to inspect the undercarriage. Use a flashlight to check hard-to-see areas.
- Check in Good Weather: Inspect your car on a dry, sunny day. Moisture can make it harder to detect rust.
- Document Any Findings: Keep a record of any rust spots you find, noting their location and size. This helps track any changes over time.
Common Areas to Check for Rust
Certain areas of classic cars are more prone to rust due to their exposure to moisture and road debris. Pay extra attention to these spots during your inspections:
- Wheel Wells and Fenders: These areas catch a lot of road grime and moisture, making them prime spots for rust. Check both the inner and outer parts.
- Door Bottoms and Edges: Moisture can accumulate in the doors, leading to rust along the bottom edges. Inspect the inner side of the door as well.
- Hood and Trunk Edges: The edges of the hood and trunk often trap water. Open these parts and inspect the inner edges carefully.
- Floor Pans: The underside of your car, especially the floor pans, can rust due to exposure to water and road salt. Check for rust from both inside and outside the car.
- Exhaust System: The exhaust system, including the muffler and pipes, is exposed to heat and moisture, making it prone to rust. Inspect for rust and corrosion.
- Wheel Arches: The area around the wheel arches can collect dirt and moisture, leading to rust. Check both the inner and outer arches.
- Window Seals and Frames: Water can seep into window seals and frames, causing rust around the edges. Check for rust under the rubber seals and along the frame.
- Under the Car Mats: Moisture can get trapped under the car mats, leading to rust on the floor. Remove the mats and check for any signs of rust underneath.
Rust Removal Techniques
Mechanical Methods (sanding, grinding)
Mechanical methods involve physically removing rust from the surface of the car. These techniques are often the first step in rust removal, especially for surface rust.
- Sanding: Sanding is one of the most common and effective methods for removing rust from classic cars. It involves using sandpaper or a sanding tool to scrub away the rust. Start with a coarse grit to remove the bulk of the rust, and then switch to a finer grit to smooth the surface.
- Tools Needed: Sandpaper (various grits), sanding block, or power sander.
- Process: Begin by cleaning the area with soap and water. Once dry, use coarse sandpaper (around 80-grit) to remove the rust. Gradually move to finer grits (up to 220-grit) for a smooth finish. Always sand in a circular motion to avoid scratches.
- Tips: Wear protective gear such as gloves, goggles, and a mask to avoid inhaling dust.
- Grinding: For more severe rust, grinding may be necessary. This method uses a power tool with a grinding wheel or wire brush attachment to remove rust quickly and efficiently.
- Tools Needed: Angle grinder, wire brush attachment, grinding wheel.
- Process: After cleaning the area, use the angle grinder with the wire brush attachment to remove rust. Move the grinder in a consistent motion to avoid damaging the metal. For heavily rusted areas, a grinding wheel can be more effective.
- Tips: Always use protective gear and ensure the grinder is in good working condition to prevent accidents.
Chemical Methods (rust converters, removers)
Chemical methods involve using products that react with rust to either convert it into a stable compound or remove it entirely. These methods are ideal for detailed work or hard-to-reach areas.
- Rust Converters: Rust converters chemically change rust (iron oxide) into a more stable compound (iron tannate or iron phosphate). This process not only stops further rusting but also creates a protective layer that can be painted over.
- Products Needed: Rust converter solution or spray.
- Process: Clean the rusted area thoroughly and apply the rust converter according to the manufacturer’s instructions. Allow it to dry completely before painting or applying a top coat.
- Tips: Rust converters work best on surface rust. For deeper rust, consider using them in conjunction with mechanical methods.
- Rust Removers: These products chemically dissolve rust, making it easy to wipe or wash away. They are available in gel, liquid, or spray forms and are suitable for light to moderate rust.
- Products Needed: Rust remover gel, liquid, or spray.
- Process: Apply the rust remover to the affected area and let it sit for the recommended time. Scrub the area with a brush if needed, then rinse and dry.
- Tips: Follow the product instructions carefully and ensure proper ventilation when using chemical removers.
DIY vs. Professional Rust Removal
When deciding between DIY and professional rust removal, consider the severity of the rust, your skill level, and the tools available.
- DIY Rust Removal: Ideal for minor rust issues and those who enjoy hands-on work. It can be cost-effective and satisfying to do the work yourself.
- Pros: Lower cost, personal satisfaction, learning experience.Cons: Time-consuming, requires tools and materials, risk of improper removal.
- Professional Rust Removal: Best for severe rust or when precision is crucial. Professionals have the experience and equipment to handle extensive rust damage.
- Pros: High-quality results, saves time, professional expertise.
- Cons: Higher cost, depends on finding a reliable service.
Step-by-Step Rust Removal Process
Tools and Materials Needed
Before you start removing rust, gather the following tools and materials:
- Safety Gear: Gloves, safety goggles, and a dust mask
- Sandpaper: Various grits (80, 120, 220)
- Wire Brush: For scrubbing away loose rust
- Rust Remover: Chemical rust remover or rust converter
- Scraper: For removing large rust flakes
- Clean Cloths: For wiping surfaces
- Primer: Rust-inhibiting primer
- Paint: Matching car paint
- Clear Coat: Protective finish
- Paintbrushes: Small brushes for detail work
- Painter’s Tape: For masking off areas
- Drop Cloths: To protect the surrounding area
Detailed Guide for Surface Rust Removal
Preparation:
- Wash the car thoroughly to remove dirt and debris.
- Dry the car completely to prevent further rusting.
Safety First:
- Wear gloves, safety goggles, and a dust mask.
- Work in a well-ventilated area to avoid inhaling dust and fumes.
Remove Loose Rust:
- Use a wire brush to scrub off loose rust.
Sanding:
- Start with coarse sandpaper (80 grit) to remove rust down to the bare metal.
- Switch to medium-grit sandpaper (120 grit) to smooth the surface.
- Finish with fine-grit sandpaper (220 grit) to prepare for primer.
Clean the Area:
- Wipe the sanded area with a clean cloth to remove dust and debris.
Apply Rust Remover:
- Follow the product instructions for application.
- Let it sit for the recommended time to neutralize remaining rust.
- Wipe off excess rust remover with a clean cloth.
Primer Application:
- Mask off surrounding areas with painter’s tape.
- Apply a rust-inhibiting primer to the treated area.
- Let the primer dry completely.
Paint:
- Apply matching car paint over the primed area.
- Use multiple thin coats for even coverage.
- Let each coat dry before applying the next.
Clear Coat:
- Apply a clear coat for protection and shine.
- Let it dry completely before handling.
Car Rust Removal Tips
Best Practices for Effective Rust Removal
Effective rust removal is crucial for maintaining the appearance and value of your classic car. Here are some best practices to ensure you get the best results:
- Identify the Type of Rust: Different types of rust require different treatments. Surface rust can usually be addressed with sanding, while deeper rust may need chemical treatments or more intensive mechanical methods.
- Gather the Right Tools and Materials: For rust removal, you will need sandpaper, rust converters, rust removers, wire brushes, and protective gear like gloves and masks. Having the right tools ensures a thorough and safe removal process.
- Start with Mechanical Methods: Begin by using sandpaper or a wire brush to remove as much rust as possible. For more stubborn rust, a grinder or drill with a wire wheel attachment can be very effective.
- Use Chemical Rust Removers: Apply a rust remover or rust converter to the affected areas. These products help to dissolve or neutralize the rust, making it easier to remove and preventing further corrosion.
- Follow Product Instructions: Always follow the manufacturer’s instructions when using chemical rust removers. This ensures maximum effectiveness and safety.
- Work in a Well-Ventilated Area: When using chemicals, ensure you are in a well-ventilated area to avoid inhaling fumes. Safety should always be a priority.
- Apply Primer and Paint Promptly: Once the rust is removed, immediately apply a primer to the bare metal to prevent new rust from forming. Follow with a quality automotive paint to restore the appearance of your car.
Tips for Avoiding Damage to Car Paint and Bodywork
When removing rust from your classic car, it’s essential to avoid causing damage to the paint and bodywork. Here are some tips to help you achieve that:
- Mask Off Surrounding Areas: Use painter’s tape and plastic sheeting to cover areas around the rust spot. This prevents accidental scratches and chemical spills on undamaged paint.
- Use Gentle Pressure: When sanding or using a wire brush, apply gentle pressure. Aggressive sanding can remove more than just rust and damage the underlying metal or paint.
- Test Chemical Products First: Before applying any rust remover or converter, test it on a small, inconspicuous area to ensure it doesn’t harm the paint.
- Avoid Using Harsh Abrasives: Use fine-grit sandpaper to minimize the risk of scratching the paint. Start with a higher grit and only use coarser paper if absolutely necessary.
- Clean Thoroughly After Rust Removal: Ensure all residues from rust removal products are thoroughly cleaned off before painting. Residual chemicals can affect paint adhesion and finish.
- Use Quality Products: Invest in high-quality primers and paints designed for automotive use. These products provide better coverage and protection, ensuring a longer-lasting finish.
Maintaining the Car’s Structural Integrity
Rust can compromise the structural integrity of your classic car if not addressed properly. Here are some tips to ensure your car remains strong and safe:
- Regular Inspections: Conduct regular inspections of your car’s body and undercarriage. Look for signs of rust in hidden areas like wheel wells, under the hood, and beneath the car.
- Address Rust Early: As soon as you spot any rust, take action. Early intervention prevents rust from spreading and causing more significant structural damage.
- Reinforce Weak Areas: If rust has caused significant damage to a structural component, consider reinforcing it with metal patches or replacement panels. Welding may be necessary for severe cases.
- Protect Vulnerable Areas: Apply rust inhibitors and protective coatings to areas prone to rust. This includes the undercarriage, wheel wells, and any areas where water can collect.
- Maintain a Clean and Dry Environment: Keep your car clean and dry. Moisture is a primary cause of rust, so ensure your car is stored in a dry environment and promptly dried after washing.
- Use Anti-Rust Treatments: Regularly apply anti-rust treatments, especially if you live in a humid climate or drive in areas where road salt is used. These treatments provide an additional layer of protection.
Post-Removal Care
Applying Primers and Paints
After removing rust from your classic car, it’s essential to protect the exposed metal to prevent rust from coming back. Applying primers and paints is a crucial step in this process.
- Clean the Surface: Before applying any primer or paint, make sure the surface is clean. Remove any dust, dirt, or grease. Use a degreaser if necessary.
- Apply Rust Converter (if needed): If there are any small traces of rust left, use a rust converter to neutralize it. This converts rust into a stable compound that can be painted over.
- Primer Application: Choose a high-quality automotive primer. Apply a thin, even coat over the treated area. Primers bond well to metal and provide a good surface for the paint. Allow the primer to dry completely as per the manufacturer’s instructions.
- Sanding the Primer: Once the primer is dry, lightly sand it with fine-grit sandpaper (around 320-grit) to ensure a smooth surface for the paint. Wipe away any dust with a clean cloth.
- Painting: Choose the right paint that matches your car’s color. Apply several thin coats rather than one thick coat. This helps in achieving a smoother finish and prevents runs. Allow each coat to dry before applying the next.
- Clear Coat Application: For added protection and a glossy finish, apply a clear coat after the paint is dry. This will also help protect the paint from UV damage and minor scratches.
Protective Coatings and Sealants
To further protect your classic car, applying protective coatings and sealants is a wise choice. These coatings provide an additional barrier against rust and environmental damage.
- Waxing: Regular waxing not only gives your car a shiny finish but also adds a protective layer. Use a high-quality car wax and apply it as per the product instructions. Waxing every few months is recommended.
- Sealants: Paint sealants are synthetic products that provide longer-lasting protection compared to wax. They create a durable barrier against UV rays, road salt, and other harmful elements. Apply the sealant evenly and let it cure as per the product guidelines.
- Undercoating: Protect the undercarriage of your car by applying an undercoating. This is especially important if you drive your classic car in areas where roads are salted during winter. Undercoatings help prevent rust and corrosion from moisture and salt.
Regular Maintenance to Prevent Rust Recurrence
Even after thorough rust removal and protection, regular maintenance is key to keeping rust at bay. Follow these steps to maintain your classic car and prevent rust from recurring.
- Regular Washing: Wash your car regularly to remove dirt, salt, and other corrosive materials. Pay special attention to the undercarriage and wheel wells.
- Inspection: Conduct routine inspections for any signs of rust. Early detection allows for prompt treatment and prevents it from spreading. Check common rust-prone areas like the wheel arches, door sills, and under the hood.
- Touch-Up Paint: Keep touch-up paint handy for minor scratches and chips. Even small damages can expose the metal and lead to rust if left untreated.
- Dry Storage: Store your classic car in a dry, climate-controlled environment. Avoid parking on grass or dirt, as moisture can seep into the car’s undercarriage. Use a car cover for added protection.
- Lubrication: Regularly lubricate hinges, locks, and other moving parts. This prevents them from seizing up and provides some rust protection.
Conclusion
In summary, maintaining your classic car’s pristine condition involves effective rust removal and prevention techniques. To keep your vintage vehicle looking its best, regularly inspect for any signs of rust and act quickly to address them. Use the rust removal techniques and tips outlined in this article to tackle rust effectively. For long-term protection, apply appropriate rust inhibitors and maintain a clean and dry environment for your car.
Regular care routines are essential to preserve your car’s value and appearance. By following these practices, you’ll not only enhance the longevity of your classic car but also ensure it remains a source of pride and enjoyment. Make it a habit to incorporate these steps into your regular maintenance schedule, keeping your vehicle in top shape for years to come.